How to Put Together Moving Boxes

Ever wondered why professional movers are much more efficient in packing than we are? One reason is that they provide packing services on a daily basis, which means they are already trained to do it in the best way possible.

When moving, one of the most crucial steps is correctly assembling the packing boxes. As mundane as this may sound, not all of us know the correct way to assemble moving boxes. But the last thing you need amind the stresses of moving is to have the content of your package fall through–especially if it is holding a precious item like a family heirloom.  

How To Put Together Boxes during the Move

If you are reading this, you probably don’t know the first thing about assembling a packing box. But dont sweat it. You came to the right place, and this is a skill that you can master easily. So continue reading to learn how to put together a moving box correctly. 

Do You Have Any Questions?

High Stream Moving is proud to offer professional local and long distance moving services in Toronto and all across Canada and the USA.

How to Correctly Fold a Cardboard Storage/Moving Boxes

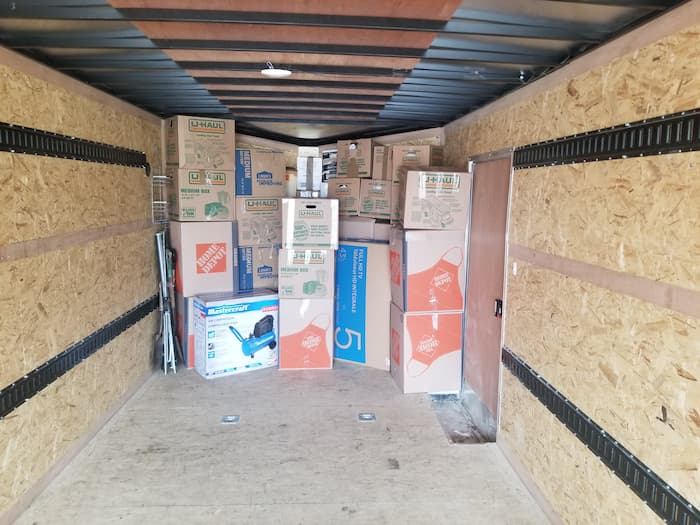
Note that packing boxes come in a flattened position (whether you are purchasing online or from your local hardware store, they all come flat). So here is how to work your way from flat cardboard to a functional packing box.  

What You Will Need

  1. Cardboard box
  2. Packing tape. Preferably a heavy-duty, weather-resistant tape that comes with a dispenser to make the application easier. 
  3. Scissors or a knife. You might not need this if the tape has a dispenser. 
Packing Moving Boxes

Process

  1. Sit the flattened cardboard box upright. The topside is the side that is connected to the smaller cardboard tabs. Otherwise, find the sign that indicates the top side. 
  2. Once you have identified the topside, now fold the flaps all the way down until they touch the sides of the box. 
  3. Now open the box so that it is no longer flat. To do this, pull the corner to the opposite side to create a rectangular, 3D shape. (the top flaps should remain folded down even after opening the box. 
  4. Now flip the box so that the folded flaps are now on the bottom. 
  5. First, fold the two small flaps inwards towards each other. Then fold the big flaps the same way but on top of the small flaps. 
  6. Use the packing tape and tape straight over the seam of the big flap to secure them into place. Extend the tape 2-3” on each side of the box.

    Note: DO NOT use other types of tape like cellophane tape as these are less secure. 
  7. Add an extra layer or two of tape on the seams to provide extra safety (the taping doesn't need to lay perfectly on the seams).  
  8. Flip the box over.
  9. Once you are done packing, repeat steps 5, 6, and 7 on the top side. 
  10. Ensure to label your boxes with the name of the room you will be unpacking it, and if there is anything flagile in it, it helps to label the box flagile so the moving company can know to handle it with care. Most importantly, 

Conclusion

Professional movers know not to put ten boxes worth of stuff in one box. Maybe this is one of the reasons why they are better at it than we are. However, you can do it too. Before you pack your box, ensure to check the maximum weight it can hold and ensure not to exceed this weight. 

However, remember that most moving services offer full-service moving packages that will remove this step from your worries. Hence, check in with your local movers or interstate movers to inquire about their services. 

Give us a call at (800) 430-1537 to experience extraordinary service from the best moving company in town!

Baby Grand4’8to 5’8Medium Grand5’6to 59ProfessionalGrand 6’Semi-ConcertGrand 74Concert Grand811’ and MoreUpright Style PianosGrand PianosSpinet36to 39Console40to 44Studio45to 49Upright50to 60